10. Decorative Book Spines for Styled Shelves
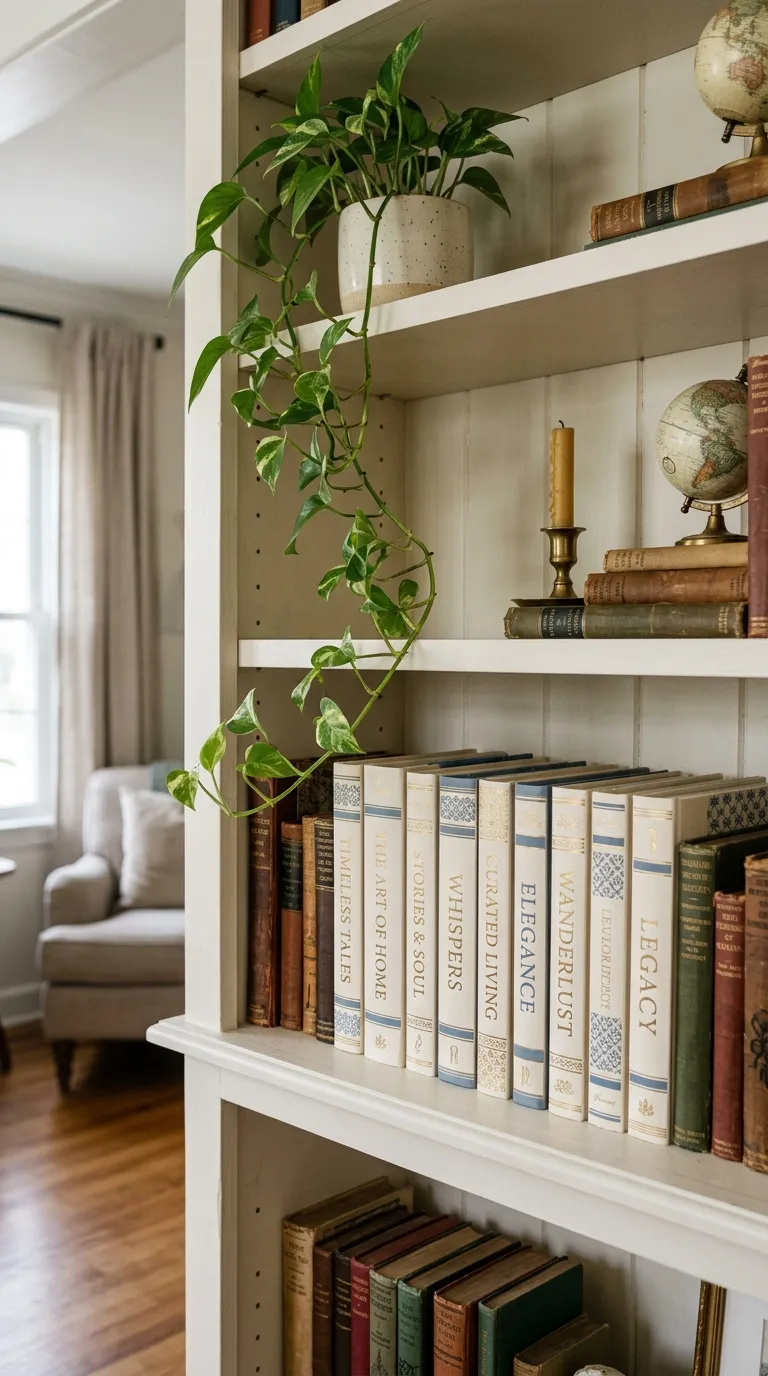
Styled bookshelves look magical when the spines coordinate, and you don’t need to buy a matching set to get the look. Using your Cricut, you can cut custom spines from adhesive vinyl or cardstock and apply them to plain books, board books, or even cardboard covered in fabric.
Materials include books or sturdy cardboard rectangles, cardstock or adhesive vinyl in your chosen palette, bone folder for crisp edges, and a hot glue gun if you’re creating faux books from cardboard. Measure each book, design the spines in Design Space with titles that suit your style, and apply.
Allow about 60 minutes for a full shelf refresh. This is a fun intermediate project that delivers a big visual payoff. A common mistake is forgetting to account for the book cover thickness, so measure with the cover closed and add a tiny bit of extra width. Display the books between real favorites to keep the shelf feeling authentic, or arrange them by color for a stunning monochromatic look.
Frequently Asked Questions
What materials do I need to start a DIY Cricut home decor project?
The basics include a Cricut cutting machine, cutting mats, vinyl or cardstock, a weeding tool, transfer tape, and scrapers. Most home decor projects add surfaces like canvas, wood, or fabric. A weeding tool kit and a basic tool set from Cricut are worth the investment because they make cleanup faster and more precise.
Are these Cricut projects good for beginners?
Yes, every idea on this list is approachable for beginners, especially the framed vinyl quote, the paper garland, and the plant pot labels. Start with one that uses just one or two materials so you can focus on learning Design Space and the cutting process before moving into layered or multi-step designs.
How long does it take to finish a Cricut decor project?
Most of these projects take between 30 minutes and two hours, including drying time. The layered wood sign and canvas wall art take the longest because of paint drying and careful alignment. Garlands and pillow covers are among the fastest when you batch your cuts.
Can I make these projects without a Cricut?
Some of these ideas can be made with a Silhouette, Brother ScanNCut, or even by hand with stencils and a steady hand. The Cricut simply makes the cutting step faster and more precise, especially for detailed fonts and small shapes.
How do I keep vinyl from peeling on my finished project?
Make sure the surface is clean and dry before applying vinyl. For high-touch items like mugs, seal the design with dishwasher-safe Mod Podge. For outdoor items like doormats, use permanent adhesive vinyl and a clear spray sealer. Always press vinyl firmly with a scraper or credit card to remove air bubbles.
What is the best vinyl to use for home decor?
Permanent adhesive vinyl works best for items that will be handled or wiped down, like mugs, doormats, and plant markers. Removable vinyl is great for renters or for seasonal decor that changes often. Heat transfer vinyl is the right choice for fabric items like pillow covers and tea towels.
How can I save money on Cricut home decor projects?
Shop end-of-season sales at craft stores, use coupons, and buy vinyl by the roll instead of by the sheet. Dollar stores and thrift shops are gold mines for blank frames, signs, and canvas. Cardstock remnants from previous projects can become garlands, gift tags, or paper flowers for free.
There’s no better feeling than seeing a piece of your home and knowing you made it yourself. Whether you start with a simple framed quote or jump straight into the layered wood sign, each project will teach you something new about your Cricut, your style, and what brings you joy. Pick one idea that speaks to you, gather your supplies, and give yourself permission to experiment. The perfect home is the one filled with pieces that tell your story, and your Cricut is the perfect tool to help you tell it.